Driver installation and software usage
for digital thermometer and 1–wire adapter DS9097 with DS18B20 digital probe attached
Lines starting with $ or C:\> indicate beginning of a command that has to be typed in. Originally this manual was written with PL2303TA in mind, but it can be also applied for other Prolific USB-to-serial interfaces, e.g. PL2303GC, PL2303GL and PL2303GS (VID_067B).
Linux driver
TOCDriver for PL2303TA (and newer PL2303 variants like PL2303GC, PL2303GL, PL2303GS) USB-to-serial interface is already included in mainline Linux Kernel (for PL2303GC, PL2303GL and PL2303GS since version 5.5) as pl2303.ko.
In most cases, after pluging the USB device into USB port, the system will automatically load a driver and report new driver in kernel log, which could be printed out by dmesg.
$dmesg | tail
...
usb: new full-speed USB device number 24 using ehci-pci
usb: New USB device found, idVendor=067b, idProduct=2303
usb: New USB device strings: Mfr=1, Product=2, SerialNumber=0
usb: Product: USB-Serial Controller
usb: Manufacturer: Prolific Technology Inc.
pl2303: pl2303 converter detected
usb: pl2303 converter now attached to ttyUSB0
Right at the end of dmesg output you should see something like the 7 lines above. This means that the thermometer has been recognized by the pl2303 driver and character device ttyUSB0 for it was created.
PL2303GC, PL2303GL and PL2303GS USB-to-serial interfaces also report their serial number:
$dmesg | tail
...
usb: new full-speed USB device number 46 using xhci_hcd
usb: New USB device found, idVendor=067b, idProduct=23a3, bcdDevice= 4.05
usb: New USB device strings: Mfr=1, Product=2, SerialNumber=3
usb: Product: USB-Serial Controller
usb: Manufacturer: Prolific Technology Inc.
usb: SerialNumber: abcde123456
usbcore: registered new interface driver pl2303
usbserial: USB Serial support registered for pl2303
pl2303: pl2303 converter detected
usb: pl2303 converter now attached to ttyUSB0
You can check whether driver has been loaded if at least the following line appear.
$lsmod |grep pl2303
pl2303                 16384  0
Depending on operating system configuration some commands, like dmesg, might require higher user privileges to be started. Hint: sudo.
Driver might be compiled (statically) into Linux Kernel (very unlikely in mainstream Linux distributions). In this case command with lsmod won't print any line about pl2303, but might be listed in kernel log.
Manually loading module
To check whether kernel driver (module) supports USB-to-serial interface look for lines containing VID=067B and device PID={2303, 23a3, …} in modinfo output.
$modinfo pl2303
filename: /lib/modules/.../kernel/drivers/usb/serial/pl2303.ko
...
alias:          usb:v067Bp2303...
...
alias:          usb:v067Bp23A3...
...
Probing could be initiated by modprobe pl2303 and status then checked by dmesg.
Kernel
If the driver is not included into kernel, it has to be selected and then, depending on your system, the kernel recompiled or the module compiled.
Some versions of Linux Kernel, mostly between 5.13 to 5.15 and 5.18, include incomplete detection logic of recent Prolific types, e.g. PL2303GC, PL2303GL and PL2303GS interfaces, hence these interfaces might not be recognized by the Kernel.
Vanilla Linux Kernel
In kernel menuconfig, i.e. make menuconfig, support can be found in menu as follows.
Device Drivers --->
  [*] USB support  --->
    <M> USB Serial Converter support  --->
      <M> USB Prolific 2303 Single Port Serial Driver
When using Buildroot — Making Embedded Linux Easy — kernel menuconfig is accessible through make linux-menuconfig
In case of .config the following lines add pl2303 driver as a module.
CONFIG_USB_SUPPORT=y
CONFIG_USB=y
CONFIG_USB_SERIAL=m
CONFIG_USB_SERIAL_PL2303=m
After editing kernel configuration, the module must be compiled, e.g.
make modules_prepare
make M=drivers/usb/serial
Compiled module is a file: drivers/usb/serial/pl2303.ko.
Patching the Kernel
As said before support for PL2303G USB-to-serial interfaces was included with this commit.
You can apply patch to your kernel (from SDK) as follows: Download patch and apply it to kernel source with patch -p1 < this-patch. (This method was tested on Kernel 5.4.223 and was successful.)
Openwrt/LEDE
On the configuration menu of OpenWrt the following modules have to be selected.
Kernel modules  --->
  USB Support  --->
    <M> kmod-usb-serial
      <M> kmod-usb-serial-pl2303
Or in .config file:
CONFIG_PACKAGE_kmod-usb-core=m
CONFIG_PACKAGE_kmod-usb-serial=m
CONFIG_PACKAGE_kmod-usb-serial-pl2303=m
Debian & Ubuntu
TOC
It is assumed that /dev/ttyUSB0 is the character device (backed by USB) representing DS9097 adapter. Look at dmesg output for lines like usb: pl2303 converter now attached to ttyUSB0.
Digitemp
Software could be simply installed from Linux distribution repository.
$sudo apt-get install digitemp
Initialize probe
Initialization is only needed for the first time.
$digitemp_DS9097 -i -s /dev/ttyUSB0
DigiTemp v3.7.2 Copyright 1996-2018 by Brian C. Lane
GNU General Public License v2.0 - http://www.digitemp.com
Turning off all DS2409 Couplers
.
Searching the 1-Wire LAN
289B4E0C000080 : DS18B20 Temperature Sensor
ROM #0 : 28289B4E0C000080
Wrote .digitemprc
The configuration is saved to file .digitemprc by default. If you want to save configuration to a different file, use -c switch.
Acquire temperature
$digitemp_DS9097 -a
DigiTemp v3.7.2 Copyright 1996-2018 by Brian C. Lane
GNU General Public License v2.0 - http://www.digitemp.com
Feb 01 10:45:36 Sensor 0 C: 22.25 F: 72.05
Initialization and acquisition can be done in one command by combining both switches, like digitemp_DS9097 -i -s /dev/ttyUSB0 -a
Periodically save measurements to a file
Digitemp can periodically acquire temperature from the probe. Command in next example runs forever (-n 0) and takes the temperature of all sensors (-a) every 10 seconds (-d 10) and saves (appends -l) them to a file ~/temps. Process could be terminated by Ctrl + C.
$digitemp_DS9097 -q -n 0 -a -d 10 -l ~/temps
owfs
Install software package.
$sudo apt-get install owfs
Mount 1-wire filesystem.
$mkdir ~/1w$owfs --passive /dev/ttyUSB0 ~/1w
List all 1-wire devices.
$ls ~/1w/
Directories belonging to the temperature probes starts with characters 28.:
$cat ~/1w/28.289B4E0C0000/type
DS18B20
Display the temperature.
$cat ~/1w/28.289B4E0C0000/temperature
26.75
owfs.conf
When connecting to the devices on 1-wire bus through owfs, DS9097 acts as passive adapter.
server: passive = /dev/ttyUSB0
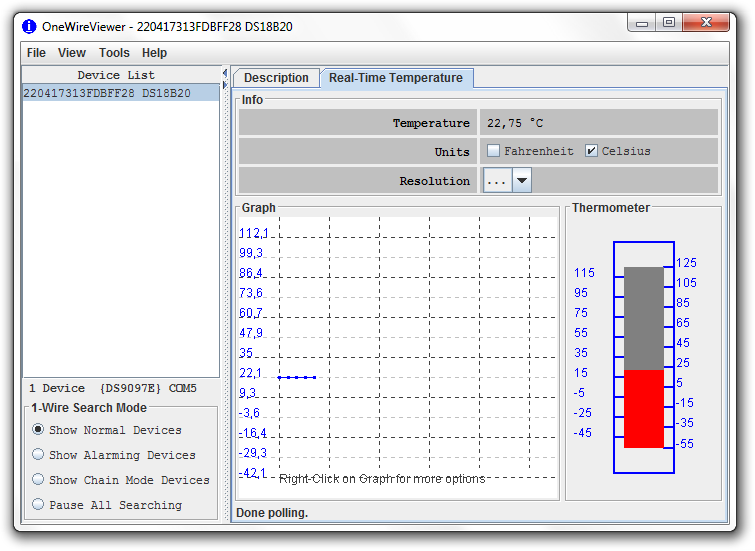
OneWireViewer
For installation see Analog's application note 5917.
Openwrt/LEDE
TOC
Make sure you have build-in support for pl2303 driver, otherwise kernel image (and Openwrt image) must be recompiled (and network appliance reflashed). In some cases, installing via opkg might work: opkg install kmod-usb-serial-pl2303
Digitemp
Install package digitemp: opkg install digitemp. If the package is not available follow manual at openwrt-packages-digitemp.
Before last step make sure you have CONFIG_PACKAGE_digitemp=y in .config file and you have ran make menuconfig. In LEDE the last step must be:
make package/feeds/hnw_digitemp/digitemp/compile
Usage is similar to that one for Debian.
owfs
Install package owfs: opkg install owshell owfs
See tutorial for Debian
Windows driver
TOCThe following pictures are based on Windows 7. The same procedure applies for recent versions of Windows.
PL2303TA might not be recognized or usable in Windows 11 since there is no Windows 11 certified driver for this interface. Usually there will be text PL2303TA DO NOT SUPPORT WINDOWS 11 OR LATER PLEASE CONTACT YOUR SUPPLIER in Device Manager.
There is a workaround by uninstalling current driver and using older driver, e.g. ver. 2.0.4, and disabling driver updates from Windows Update.
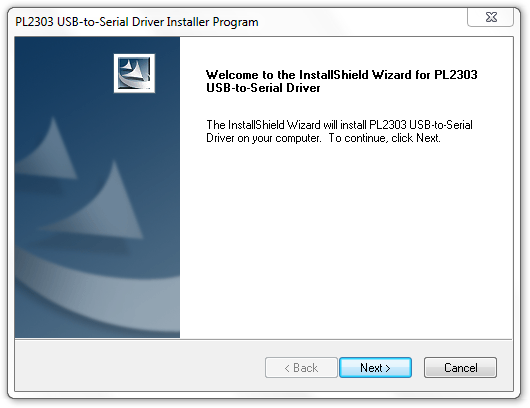
In many cases Windows automatically detects USB serial interface. If it does not, a manual installation of drivers is needed.
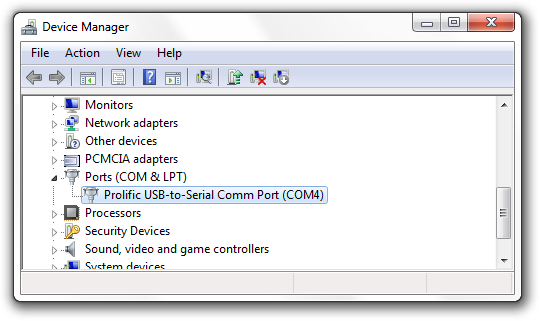
After installation open Device Manager and under Ports (COM & LPT) read name of new serial port. In next example, the serial port has name COM4 and number 4.
 Type of recent interfaces is also recognized.
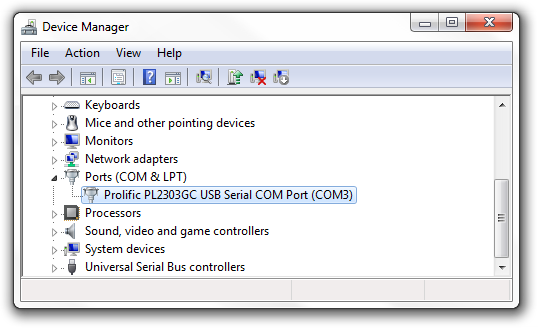
Recent interfaces (PL2303GC, PL2303GL, PL2303GS) need recent driver, i.e. ver. 4.0.2
Windows 7, 10 and newer
TOCIn following examples it is assumed that the device appeared under COM4 serial port.
Digitemp
TOC
Download digitemp.exe and open command prompt cmd. Navigate prompt to a directory where digitemp executable is located.
Initialize probe
Initialization is only needed for the first time. Number after -s flag represents serial port number. 4 for COM4, 5 for COM5 etc.
C:\>digitemp.exe -i -s4
Acquire temperature
C:\>digitemp.exe -a
Periodically save measurements to a file
Digitemp can periodically acquire temperature from the probe. Command in next example runs forever (-n-1) and takes the temperature of all sensors (-a) every 5 seconds (-d 5) and saves (appends -l) them to a file temps.txt.
C:\>digitemp.exe -q -a -n-1 -d 5 -l temps.txt
LogTemp
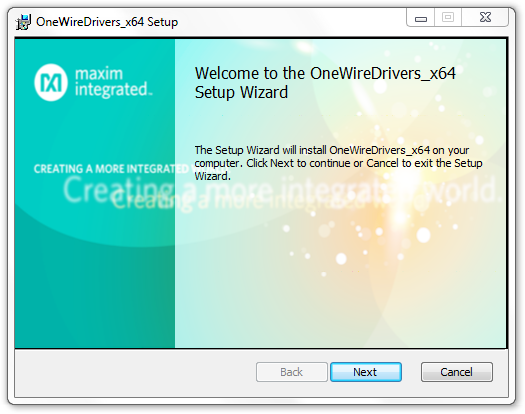
TOCThis application uses drivers from Maxim, so these must be installed first.
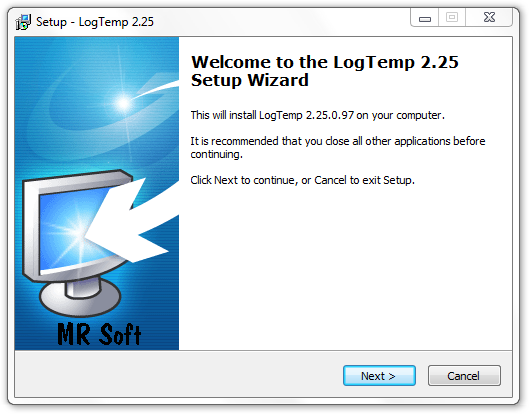
Continue with installation of LogTemp.
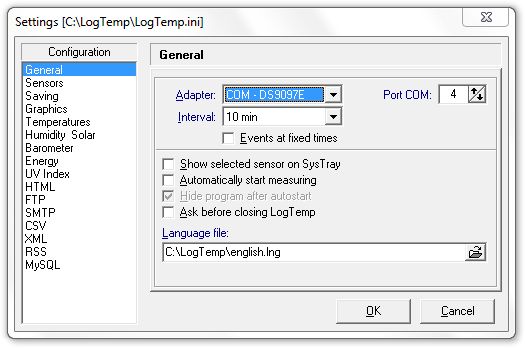
In the configuration set Adapter to DS9097E and Port COM to match your serial port name.
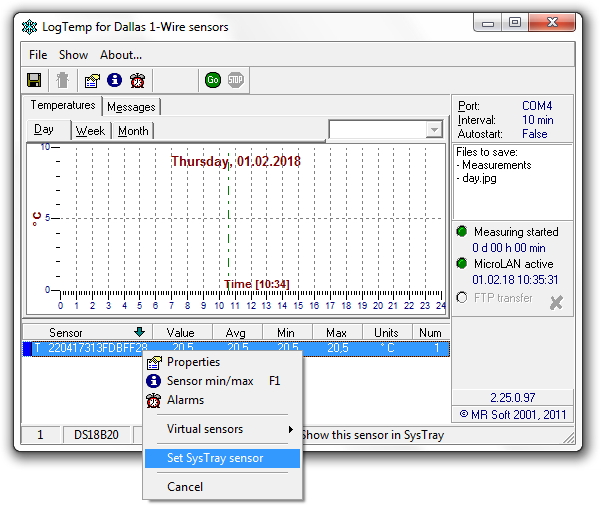
To start taking measurments click Go on toolbar.
OneWireViewer
TOCThis application requires Java RTE, e.g. Azul JRE 8, to be installed on the system.
Extract two files from an archive: OneWireViewer.jar and OneWireAPI.jar to a folder. Then navigate Windows Command Line to folder and there execute:
C:\>java -classpath OneWireViewer.jar;OneWireAPI.jar;. OneWireViewer
There is a run.bat batch file inside the archive that does the former.
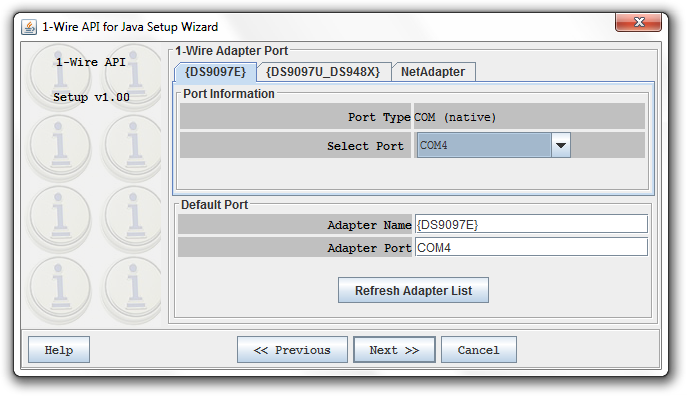
In the setup window make sure DS9097E tab is selected and set Select Port to match your serial port name.
After two more click to Next, a new window appears where 1-wires are given on left pane.